Make Christmas extra special this year when you create and give your own handmade gifts! Paint and share these fun Christmas ornaments with this simple and quick step by step tutorial.
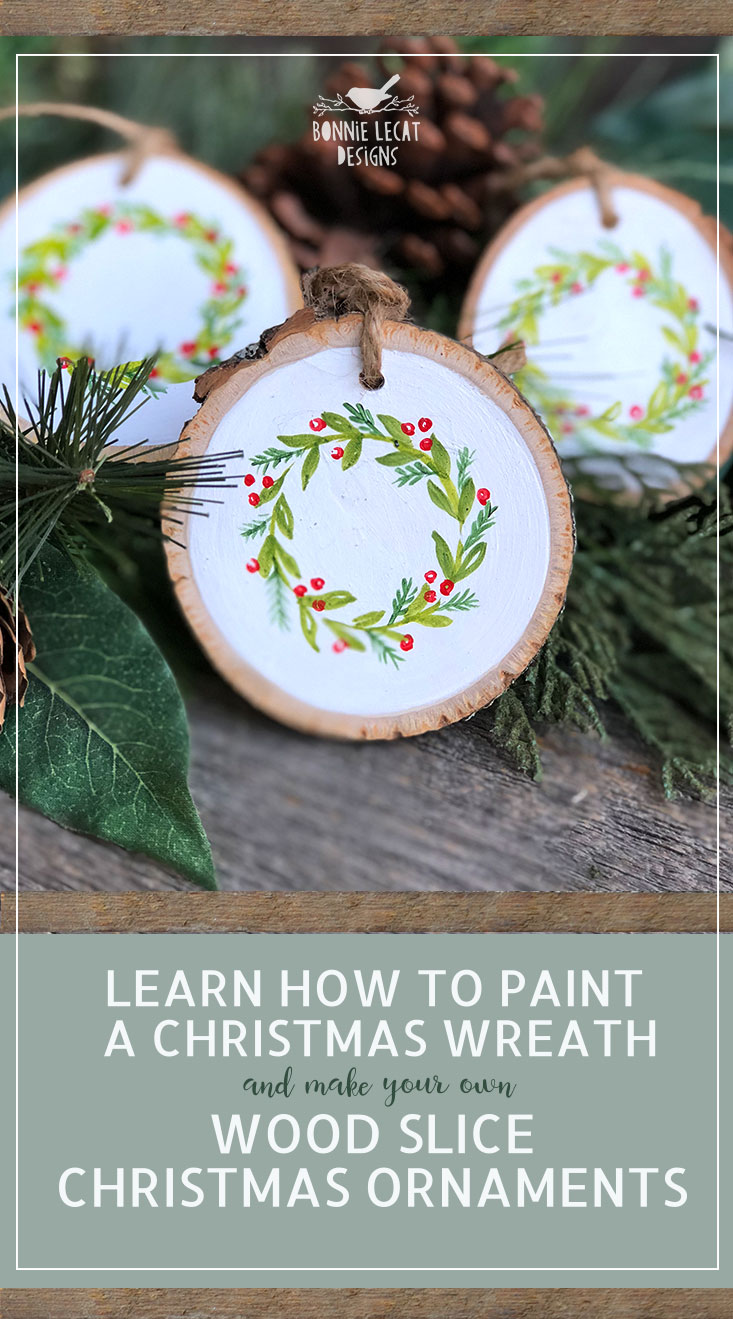
Well, like it or not, it’s time to start planning and decorating for Christmas! I’ve made my gift list using this free printable Christmas gift planner and I’m feeling super festive and organized. 🙂 Of course, my list wouldn’t be complete without adding some handmade gifts to give to my family and friends, right??
I’ve been making handmade ornaments that feature this simple wreath painted on some cross-cut wood pieces. They are going to look great on my tree or tied on my gift-wrapped packages. I’ve had so much fun painting them, that I want to share the process with you.
Here’s everything you will need to create this fun and easy art project.
SUPPLIES YOU WILL NEED TO CREATE YOUR OWN HAND PAINTED WREATH ORNAMENTS:
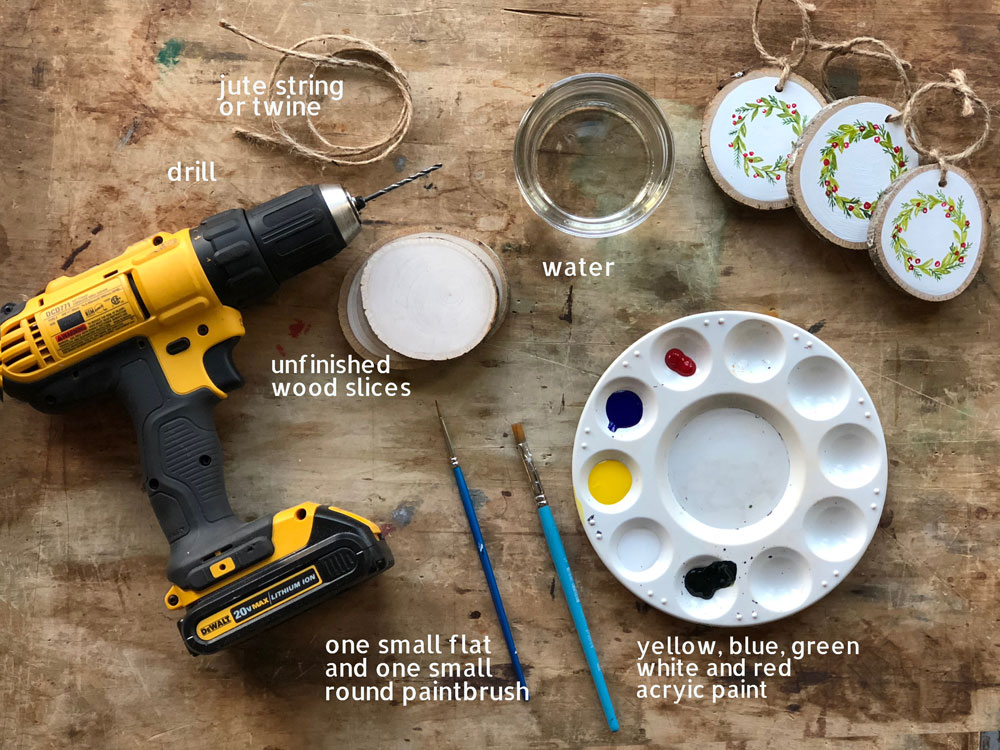
- + Acrylic paints in the following colors: green, yellow, blue, white and red
- + Water for rinsing your brush
- + Two paint brushes; a small round watercolor or acrylic paint brush and a small flat paintbrush
- + Wood slice or wood round – you can find these in the unfinished wood section of your local craft store
- + Jute string
- + Drill (this is OPTIONAL: you will only need it if you don’t buy your wood slices pre-drilled)
SIMPLE STEPS – How to Make a Wood Slice Painted Wreath
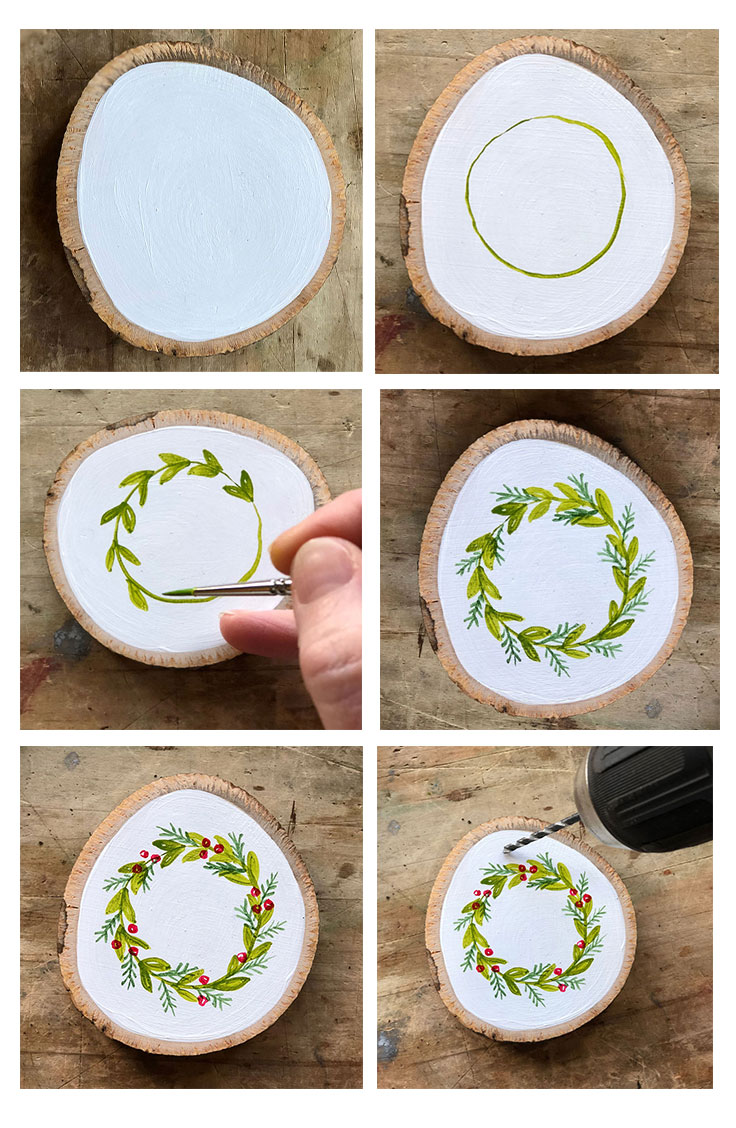
1. Paint the background of your wood slice with white paint using your small flat brush. Let dry.
2. Mix the yellow and blue acrylic paint to mix a light green color. Use the small round brush to draw a circle on your wood slice.
3. Make your way around the circle and paint simple leaves going in the same direction
4. Use your darker green paint to paint some evergreens in your wreath by drawing a line with simple lines coming out of each side. Repeat these around the entire circle.
5. Paint the berries by using your red paint and making small circles placed around the wreath.
6. Using a drill, create a small hole in the top of the ornament. You can also buy pre-drilled wood slices if you don’t have a drill.
You can then repeat the painting process on the back or get creative and add some wording or a name or whatever you like. Here’s an example of some hand lettering that I added to one of my ornaments:
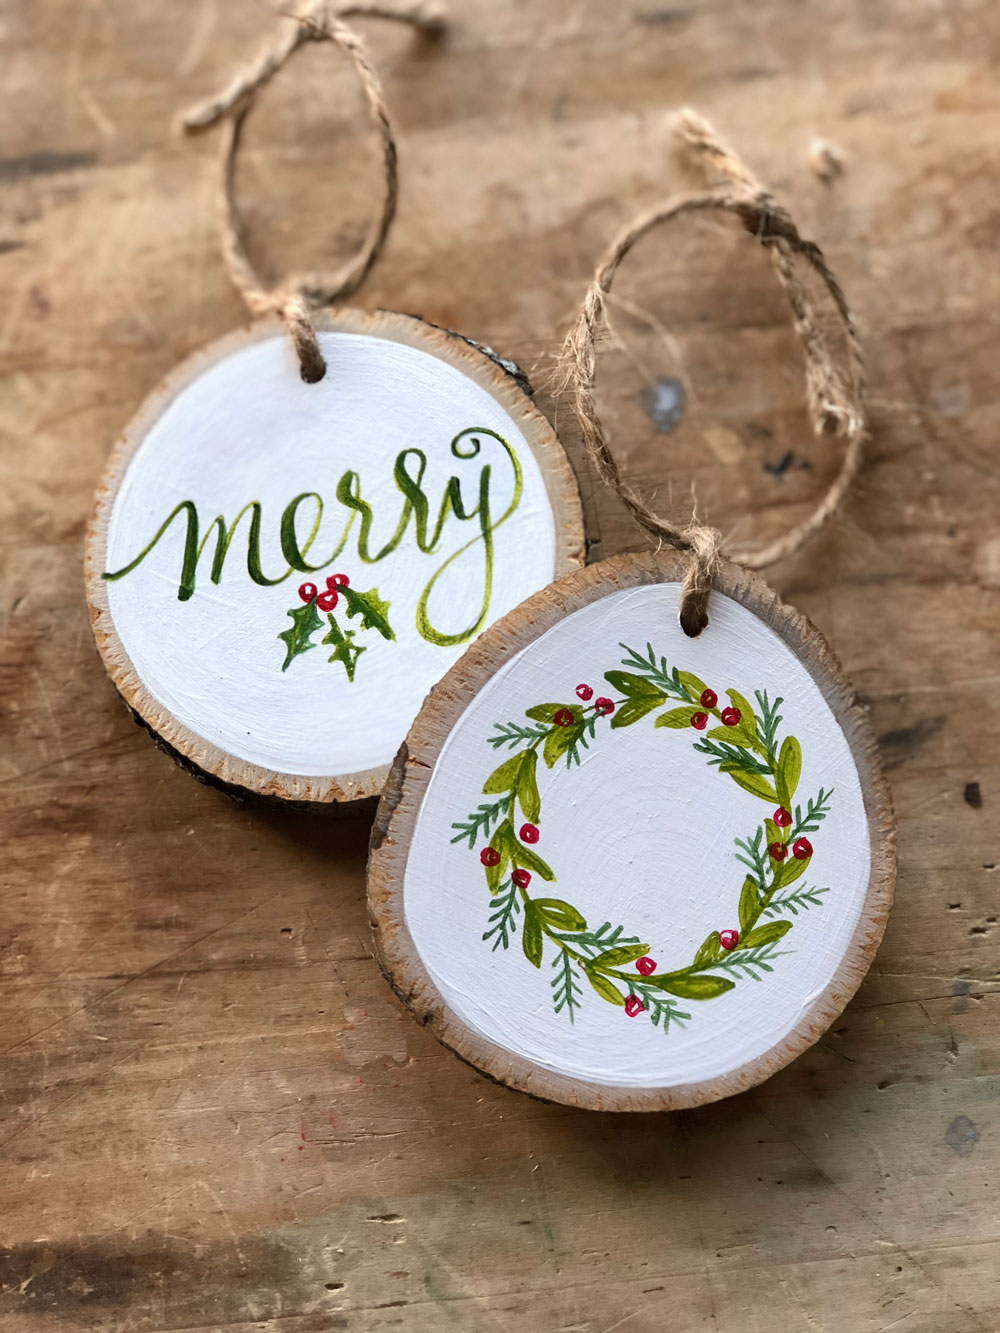
Finally, thread your jute string through the drilled hole and tie it so that you can hang it on your tree.
That’s it, friends! You did it:) If you like this craft, you might also want to check out my Thanksgiving magnets post which was also made from unfinished wood slices.
And if you like to paint and craft, please check out my classes on skillshare.com. You can use this link to get two free months and check out all the painting and craft classes you want for FREE!
Happy Holidays!! xo
Hi Bonnie, how long would you say the paint lasts on these.? Do you think a coating or sealer would help the ornament last against scratches and scuffing if being boxed with other ornaments? Looking forward to trying this project out! Thank you. – Lora
Hi Lora,
The paint should be pretty durable and long-lasting, depending on the type you use. For the most part, acrylic paints are really strong. That being said, it certainly wouldn’t hurt to topcoat them with a varnish or topcoat. Any type of water-based varnish or topcoat should work as long as your paint is dry first. It will also help the paint adhere to the wood slice if you make sure that it is clean, dust free and dry before you begin painting. I would also recommend wrapping them in something if you are putting them in a box with other ornaments and don’t want any scuffs or scratches. I hope that helps!! Let me know how it goes:)
Hi newbie here I’m going to try this because I love it thanks .
Thanks! So glad that you’re going to give it a try. If you’d like to share the results on IG be sure to tag me.
Thank you so much Bonnie. I just made one and looks fantastic. Thank you!
So glad you enjoyed it, Tanya! If you are interested in doing some more painting projects, please click this link for two free months on skillshare.com to try some more classes:) Also, I’d love to see your finished ornaments!! If you’d like to share the results on IG be sure to tag me so I can check them out. Thanks!
Do you teach painting carvings of animals, birds and other carvings? I’m interested in being able to paint feathers, fur and other details on my carvings.
Hi Ralph,
Thanks so much for your inquiry, but that is not something I teach.
Can we use fabric paint instead of acrylic paint
I actually wouldn’t recommend using fabric paint. Thanks for the question and good luck with your project!!
Hi Bonnie, a few queries
1) can I know the measurement of the wood slice diameter that you have used
2) Can I use fabric paint instead and does varnish coat work on it
3) do I need to treat the wood with anything else before applying the coat of paint
Hi Marietta,
Thanks for the questions!
1) The wood slices I used were about 4″ in diameter.
2) I would use regular acrylic as opposed to fabric acrylic.
3) You do not need to treat the wood with anything before applying paint. Just a coat of white paint will work:)
I hope that helps! If you post your finished painting on social media, make sure to tag me @bonnielecat so that I can see!! xo -Bonnie
THESE ARE BEAUTIFUL! I recently tried painting wood slices and had an issue with them cracking. Any suggestions? Thank you!!!
Hi Beth, Unfortunately, I’m not sure what you could do to prevent that. It’s probably due to the dry air. If your home is really dry, you could try a humidifier?? I hope that helps!
These are adorable! For the words, did you use paint or a marker? Thanks!
Thank you, Jackie! I used a paintbrush, but you could certainly use a marker if you are more comfortable doing that:)