Yay!! It’s here…the season of pumpkin spice lattes, chunky sweaters, apple cider, and decorating for Halloween.
I have to admit, I’m kind of a Halloween decor junkie and I LOVE to pull out all of my fun and (not too spooky) pumpkins, black cats, ravens and spiders to express my love for the holiday.
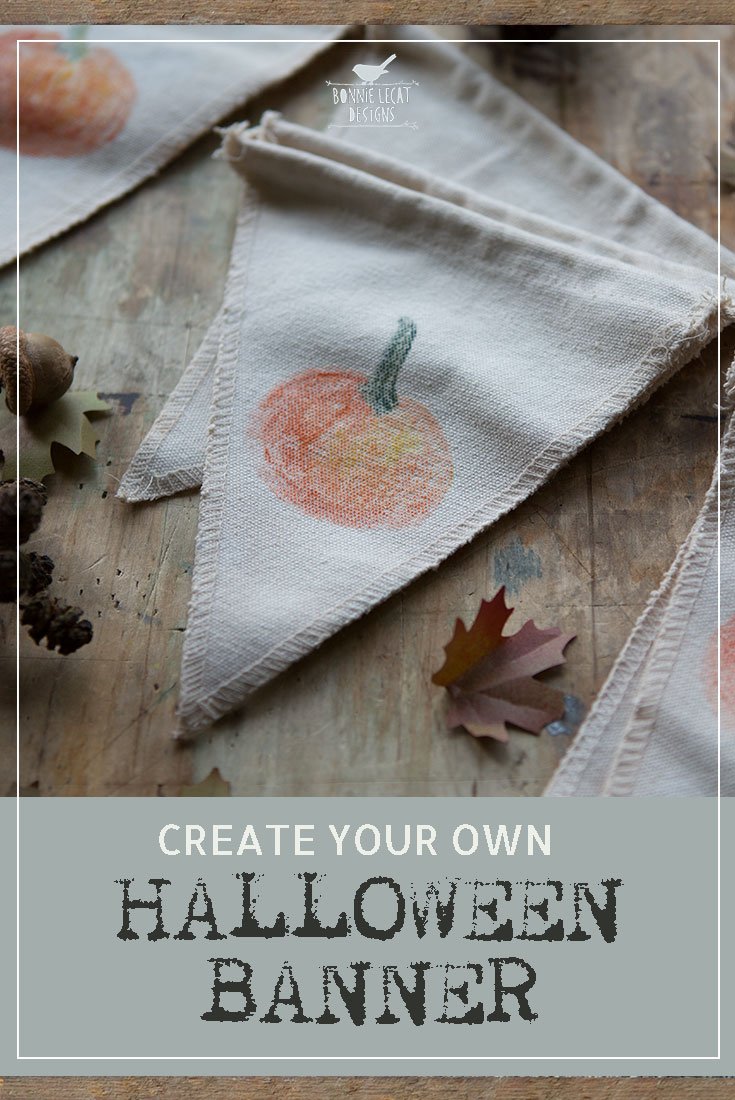
I try to come up with new Halloween crafts each year because there are just way too many cute and creative things you can do with all of the fun holiday themes! This year I decided to make a vintage style pumpkin banner to add to my fireplace mantel display and I was so happy with how it turned out, I wanted to share it with all of you.
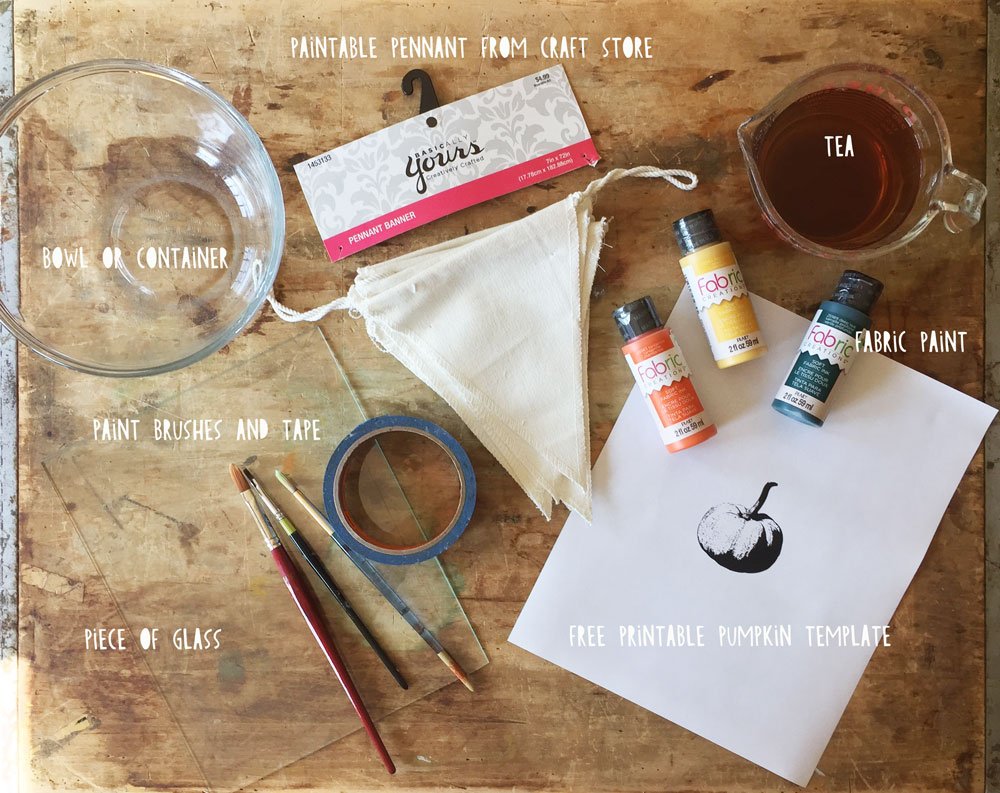
Here’s what you will need to create your own vintage style pumpkin banner to add to your fireplace mantel, wall, or door:
1. FREE pumpkin line art to use for reference
2. Paintable canvas pennant banner (I got mine from Hobby Lobby)
3. Fabric paints in green, yellow, and orange and some water to rinse your brushes in when you’re done using them
4. A medium and small paint brush
5. Painter’s tape
6. A piece of glass (I got this piece in the framing section at Michael’s. You can also just borrow a piece from a frame or most hardware stores will cut a small piece of glass for you for a few bucks. I promise it’s easy!)
7. OPTIONAL: Tea and a bowl to soak the banner in if you would like to age your banner with a tea-stained aged look
A trip to your local craft store should get you everything you need to create your banner.
Once you’ve collected your supplies and downloaded your pumpkin template, you’re ready to begin.
STEP 1)
Soak your banner overnight in tea to give it a vintage and aged look. This step is optional. I soaked mine overnight and it was slightly stained. If you would like it to look even more “aged”, let it soak for longer.
STEP 2)
Remove the banner from the tea and let dry.
STEP 3)
Download and print your pumpkin template in a size that is appropriate to your banner.
Note: You can adjust the size of the pumpkin in any image editing software if necessary.
STEP 4)
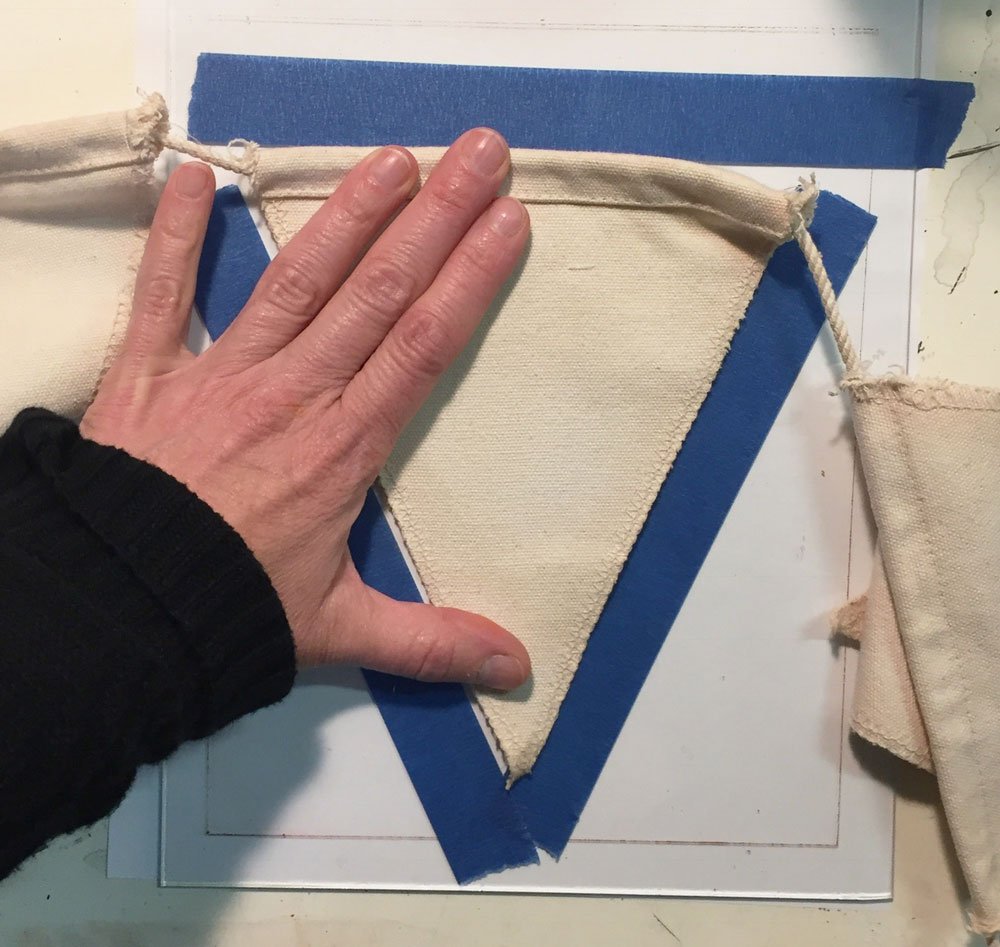
Place your pumpkin onto your work surface, then set your glass over the top. Position one of your pennants on the glass over the top of the pumpkin and tape along the edges to mark where you will place the pennant when you make your print.
I know what you’re thinking. WHY THE GLASS? CAN’T I JUST SKIP THAT? Doing this step will ensure that the placement of the pumpkin will be the same on each pennant of your banner.
It also eliminates the need to trace or draw anything onto the fabric and is super simple and quick. It will give your painted pumpkins more of an aged, faded, and vintage look by leaving some spots of paint a little patchy. This imperfection will actually make your banner look more authentic. So, I encourage you to try this printing method which was actually used by the famous artist Paul Gauguin.
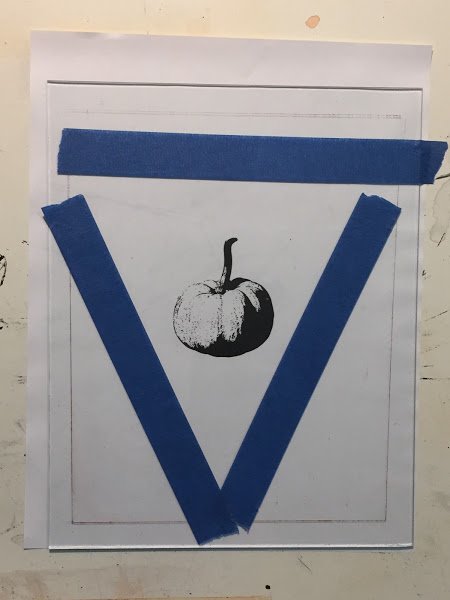
Tape the shape and size of each pennant onto your glass directly over your pumpkin print to ensure accurate size and consistent placement of each pumpkin you paint.
STEP 5)
Now brush your yellow paint and orange paint right onto the glass surface, directly over the pumpkin image, making sure to move quickly. Try not to add water to your paint so it doesn’t bleed and get blotchy when transferring it to the banner. Then add the green paint to the stem right away before any of the paint dries.
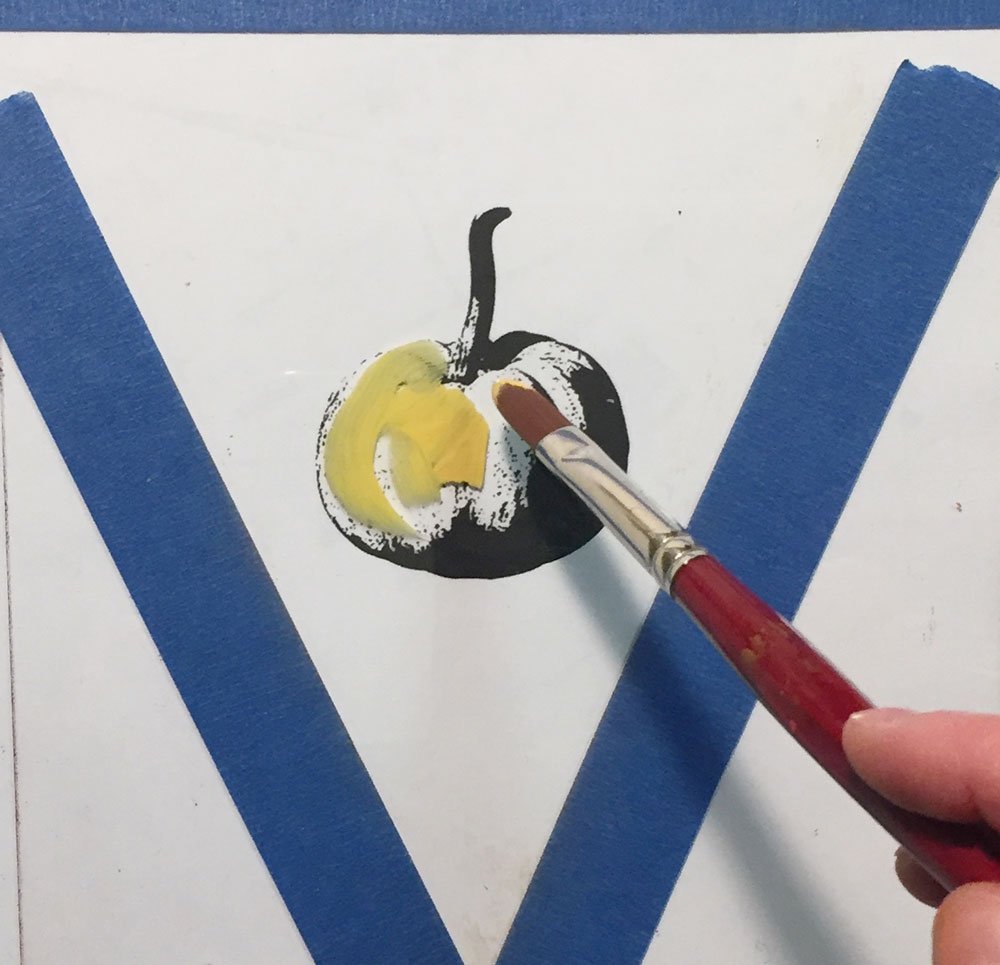
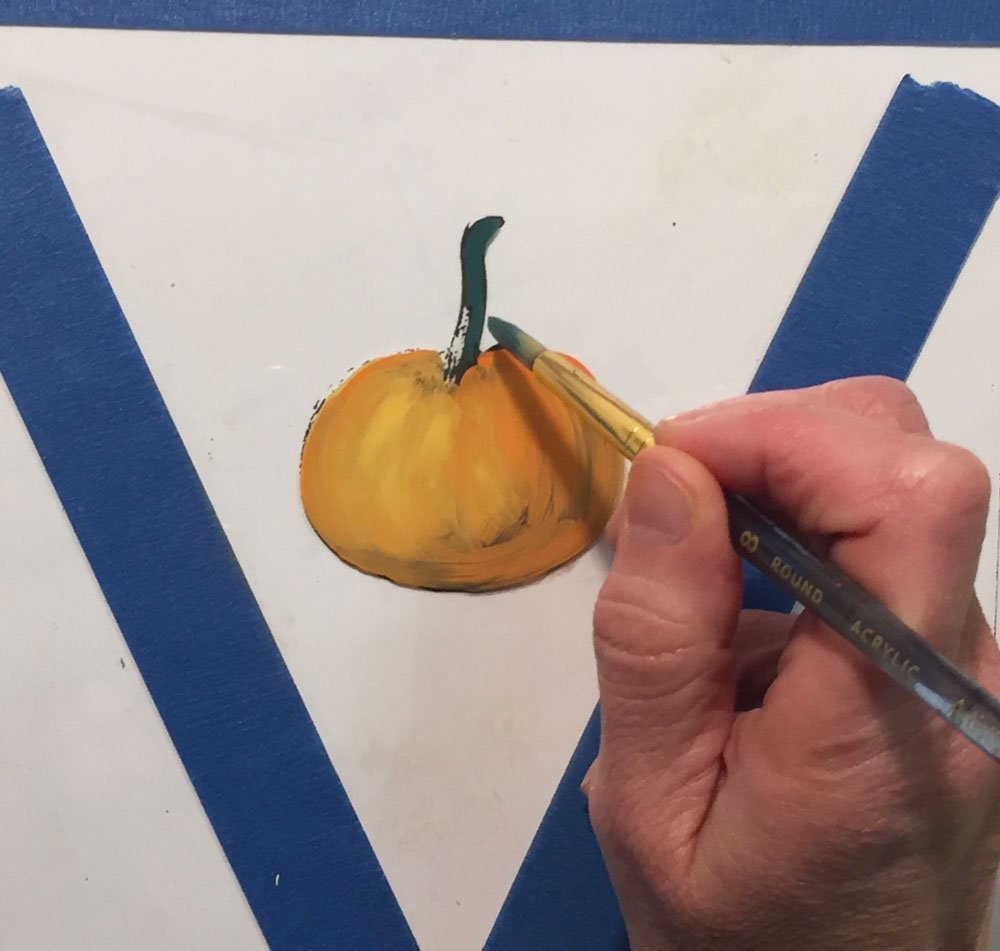
STEP 6)
While the paint is still wet, place the first pennant face down onto the glass, using the tape to guide your placement. Rub gently over the top so that the paint adheres to the fabric surface.
STEP 7)
Gently pull the fabric back to reveal your pumpkin painting. If it needs more paint, go ahead and repaint the glass and reprint it if you would like. You can do this as many times as you wish. After you’ve finished each pennant, use a damp cloth or paper towel and simply wipe clean the glass and make sure it is dry before starting your next pennant in the same method.
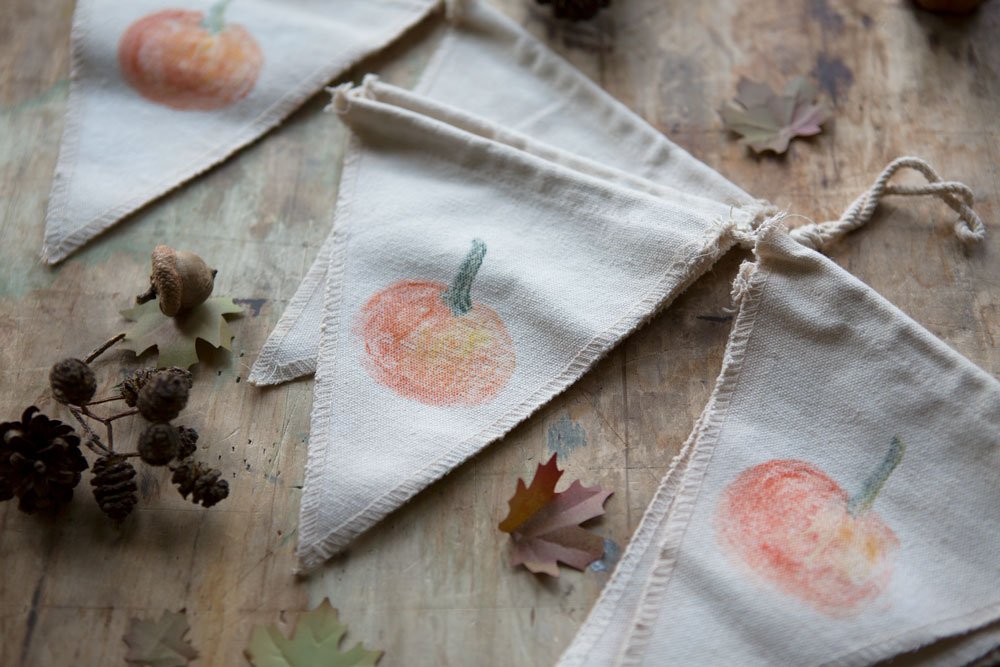
Using this printing method will give your completed banner an aged look and vintage farmhouse style.
STEP 8)
Repeat step 7 on all of the pennants and your banner is done! Add it to your fireplace mantel display or anywhere you wish. Bonus: leave it up through Thanksgiving for an extended holiday use!
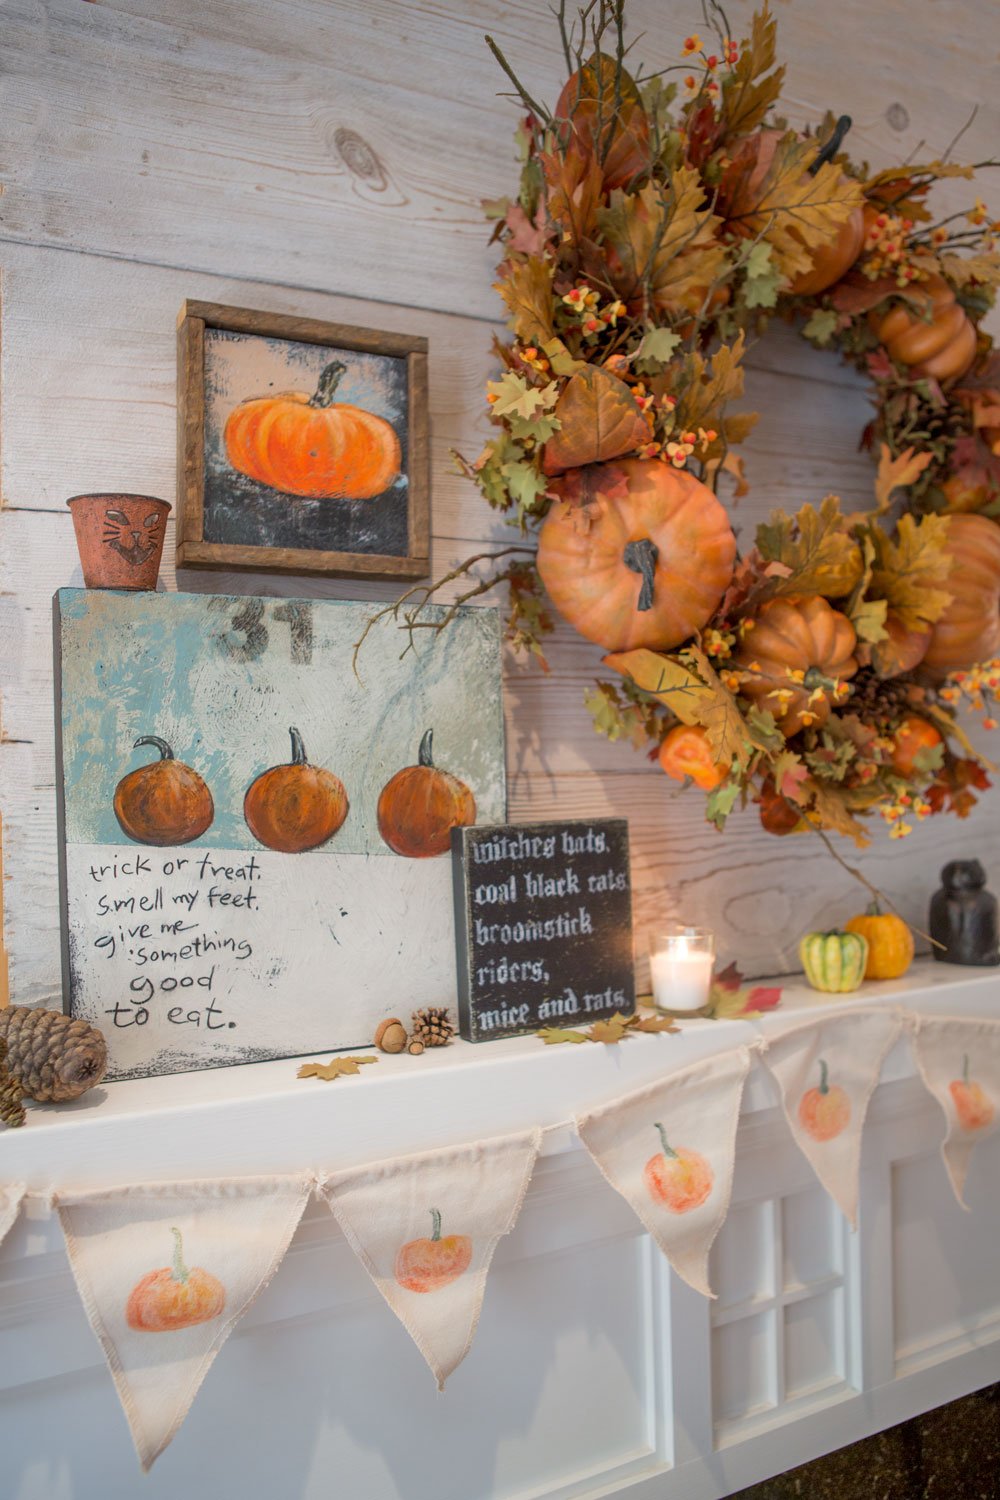
Completed Halloween mantel display.
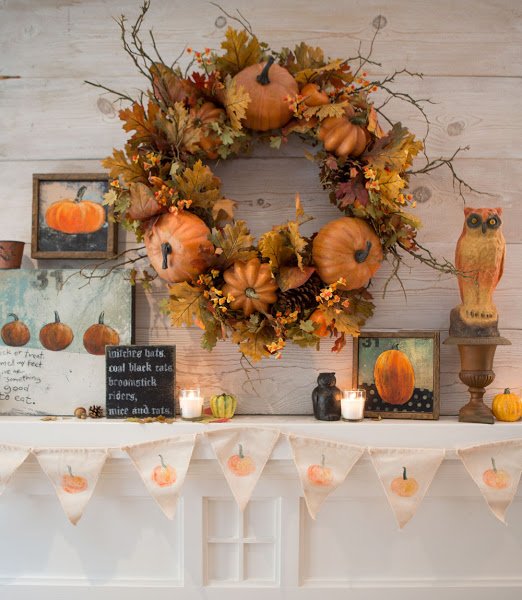
Completed Halloween mantel display.
YOU DID IT!! It was so fun creating with you! If you enjoyed this craft, please sign up here to keep in touch and keep creating together:)
As a bonus for signing up, I will send you a coupon for 10% off your first purchase right away. Use it to add some new Halloween prints to your amazing new Halloween mantel display!
P.S. If you don’t have a fireplace, and would rather use your banner in a Halloween gallery wall display, I’ve got you covered! Check out my “gallery wall challenge” here for easy tips and step by step instructions on putting your wall display together.
Please post your completed banner with the hashtag #createwithbonnielecat so that I can see your amazing artwork.
Happy Halloween!